Patterns In Nature
March 2021
This is a transcript of the video above.
I’d like to show you a new artistic process that I’ve developed. Last year I wrote and filmed an abstract art course, and for one of the modules, I investigated and tried out pour painting. This was totally different to my usual style – most of you know I can sit and observe something and draw it exactly. But I think it’s healthy to try out new things, and as you will see in this short video, the pour painting part is just the first step in the process. The second step is more reliant on draughtsmanship and enhancing details.
First step – using the pour technique
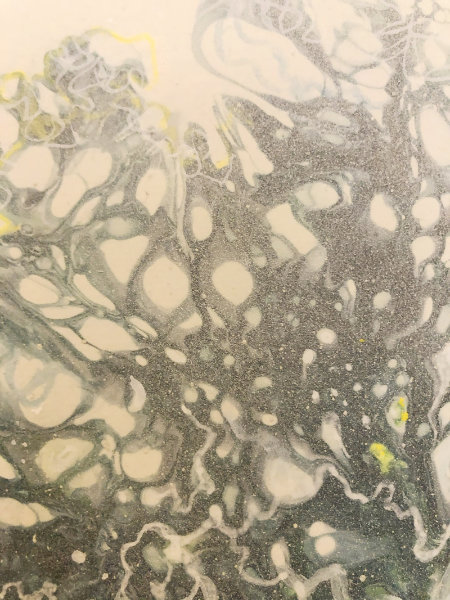
Pour painting is basically when you thin your acrylic paints with a medium that makes it pour in a more fluid way, but without weakening the opacity and chemical properties of the paint. Different colours of paint get added to the canvas in a variety of different ways – sometimes literally poured on from a cup all at once, hence the name – and the artist can tilt the canvas or use a number of tools to achieve visually interesting results. It seems as if you need no artistic talent to do this, but it’s actually quite challenging, especially with the consistency and amount of paint and the order that you add your colours together. It is a very tactile, messy (!) and hands-on approach to colour and paint, and like many other art practices, it’s extremely addictive and you learn as you go. I’ve had enough experience now to figure out how to make this technique compliment my artistic practice.
Balance between intuition and spontaneity/planning and skill
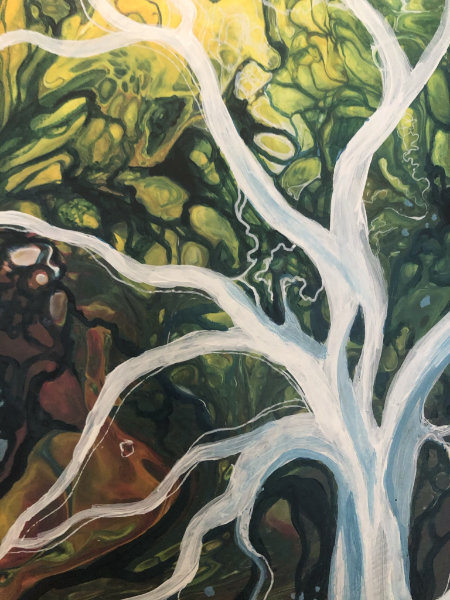
I’ve been exploring what I call a more “intuitive” technique when it comes to my organic, stylized tree drawings and other patterns that are inspired by nature. This painting that you see before you now started with an initial mood board of springtime colours, foliage and leafy patterns. I did a whole series of them, all with similar colours and nature theme. In this one I had in my mind’s eye a white sky with a forest-like expanse in front of it. Once I had put the paint roughly where I wanted it, I used a hairdryer to blow out the white into the green to help it to blend and fuse, and I used a blowtorch to help the silicone I had dropped into the paint to react and create those marvellous cell-like shapes.
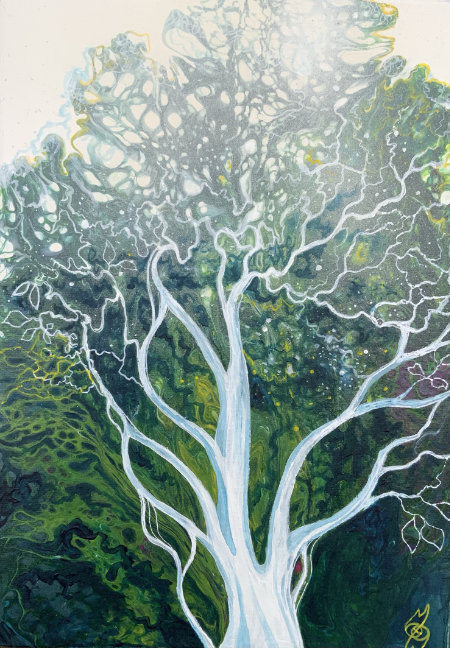
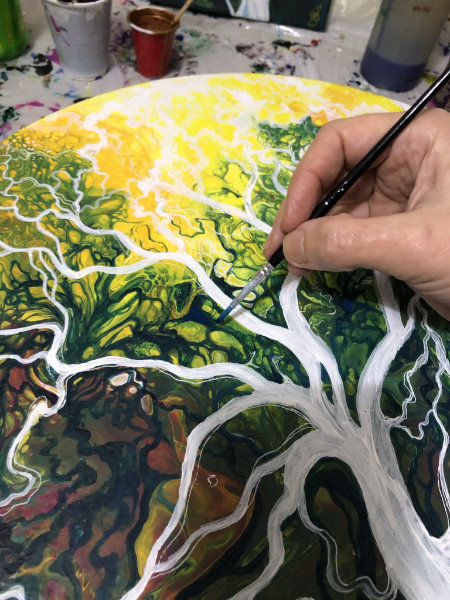
Second step – pull out “essential properties” and enhance/fade down certain areas
The second step came after the painting had completely dried. I observed it and used my inner voice to ask what it wanted to be. I did a quick sketch on a separate piece of paper which captured the essential properties and shapes I felt would be harmonious with what was already there. Then I returned to something very familiar to me: a small paintbrush and white acrylic paint! I put the branch/trunk shapes on and used the existing shapes that had formed “by chance” to inspire and dictate where the next marks should go. I also enhanced areas that I felt should be darker with dark forest green paint, and did my signature “wispiness” and wavy lines that echo ripples, leaf shapes and waves.
I used a touch of white spray paint at the top, which looks a bit like a haze of sunlight and builds atmosphere. It sort of emphasises the way the light floods into the tree and gives it energy, which it then exudes as part of itself.

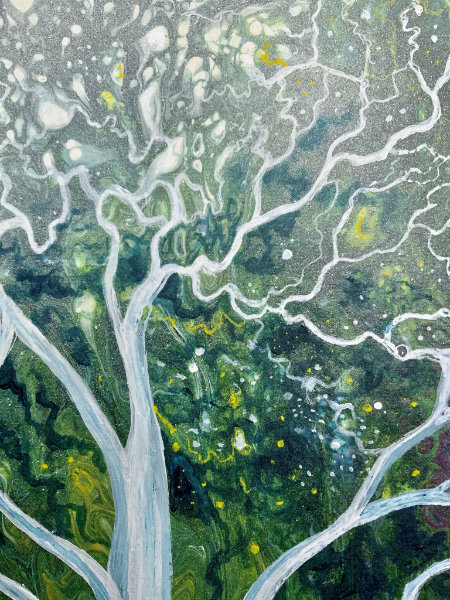
“Knowledge of the Glory” painting
In the same way, I did this next painting, which is my first ever painting on a circular canvas!
This one has tons of detail and I spent ages just sitting picking out endless streams and channels and interesting “harmonious” shapes. An awareness of negative space as well as positive space is essential for this technique to work. These paintings are in the “Patterns in Nature” gallery.